I’ve joined The Stafford Challenge to write a poem every day starting tomorrow for the remainder of the year. It’s free, and it looks like a great way to connect and encourage other writers, according to their website. If you’re participating in the challenge, I hope to see you there! I’ll still be regularly participating in all the writing groups I have grown to love – and adding one more! I deeply appreciate all of the writing groups and those who share their ideas and slices of their lives with me.
Nightstand After
Heartfelt thanks to Two Writing Teachers for hosting the weekly Slice of Life , giving writers inspiration and space to share.
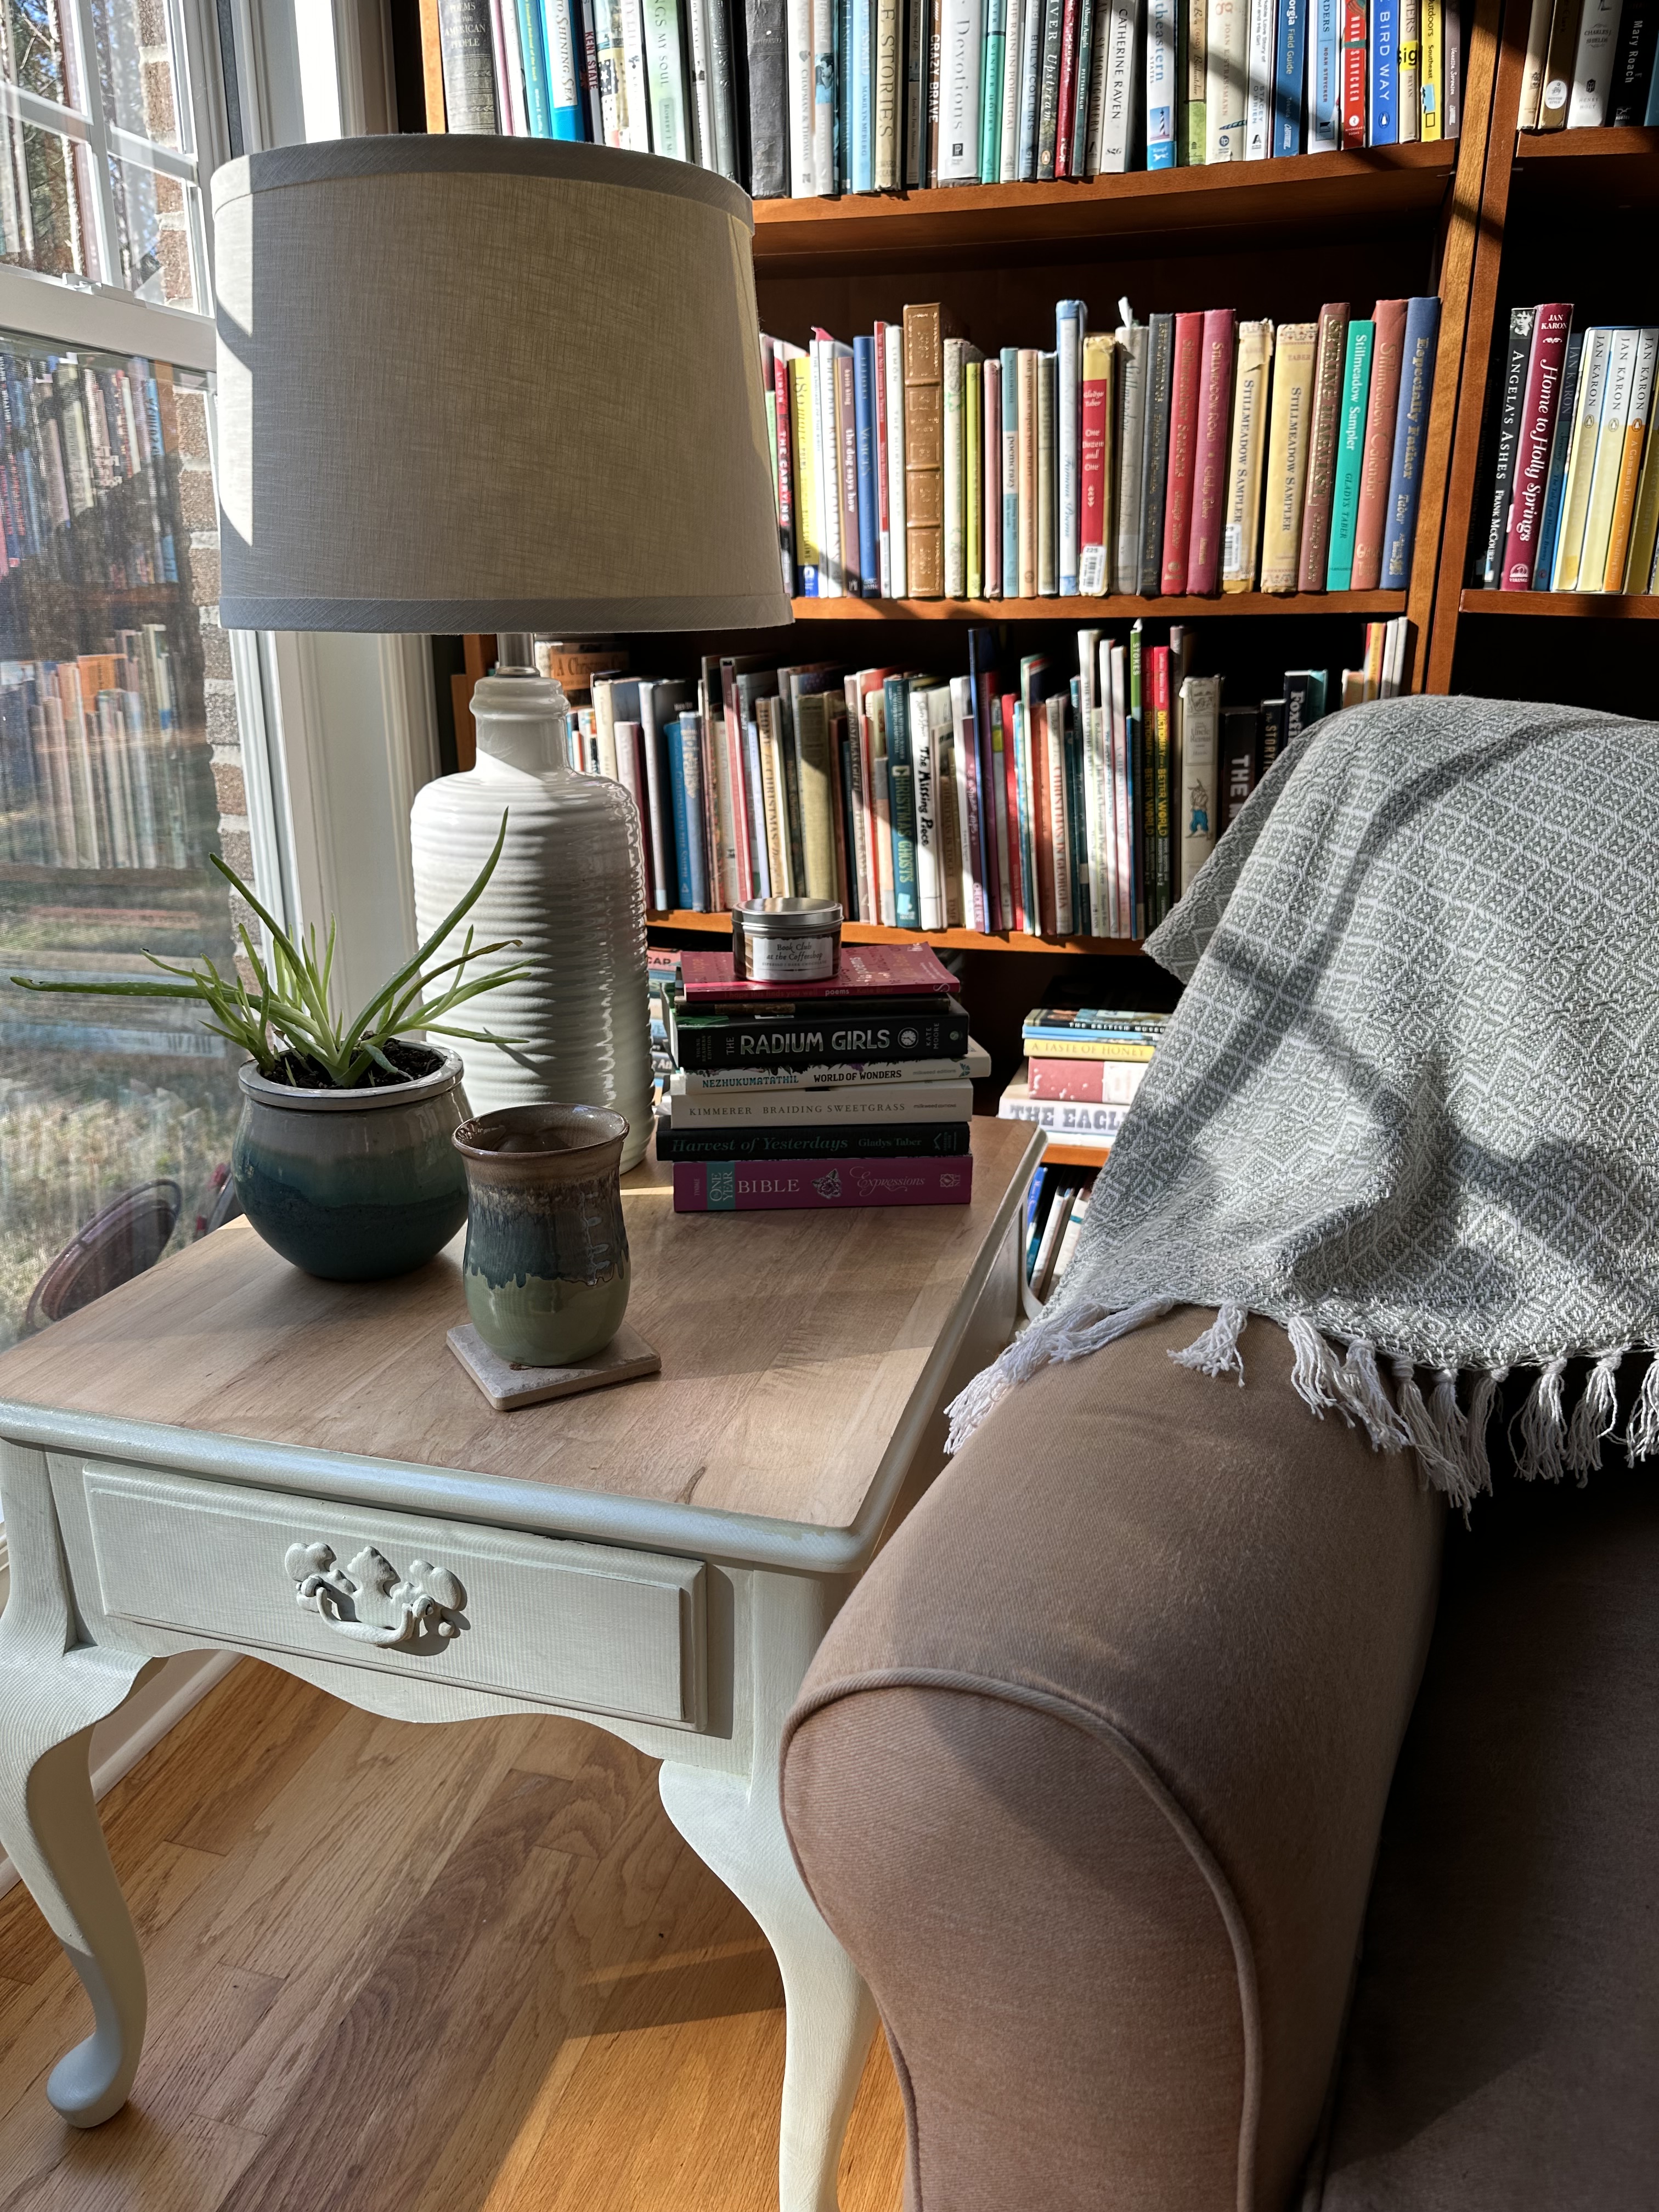
Fifteen years ago, after we’d just moved into the house we designed during dinnertimes on napkins while we dated, I scoured thrift shops for inexpensive furniture and was surprised to find a little end table in amazing condition for ten dollars. It had a lot of scratches on it, but I figured it would mostly be covered with books and other things, so I scooped it up for my reading room, to sit beside the chair with a lamp – to hold my To Be Read pile and my coffee.
As I looked at pieces of furniture needing a face lift at the beginning of 2024, this little table made the short list. I moved all of the things it was holding and dusted it off, getting it ready for a couple of coats of paint and a good polishing.
Table before the refinish, turned with the brass-handled drawer facing the bookshelves
I sanded the top to find a much lighter wood – pine, stained in a rich chestnut color originally. Since I sit in the reading room to watch birds and enjoy the southeasterly views of the farm, I decided on a Sparkling Sage (Valspar) chalk paint for the bottom of the table, keeping the color of grass and life close at hand. Once I discovered the wood was a lighter color, I resisted the urge to whitewash the top and instead keep the natural wood under a coat of clear satin water-based polyurethane. I also decided to do something I haven’t done before – I kept the original hardware and painted it, too.
Upcycled table iin the morning stream of sunlight
With a few touches of coordinating colors in decor accents, I’m pleased with the way it turned out. Now I’m ready for a new foot pouf to throw up my feet as I read and watch for birds to come to the feeders.
And I’ve already got my eye on the next project that I want to accomplish as I look to paint and re-create before the annual cycle of deep spring cleaning begins in March.
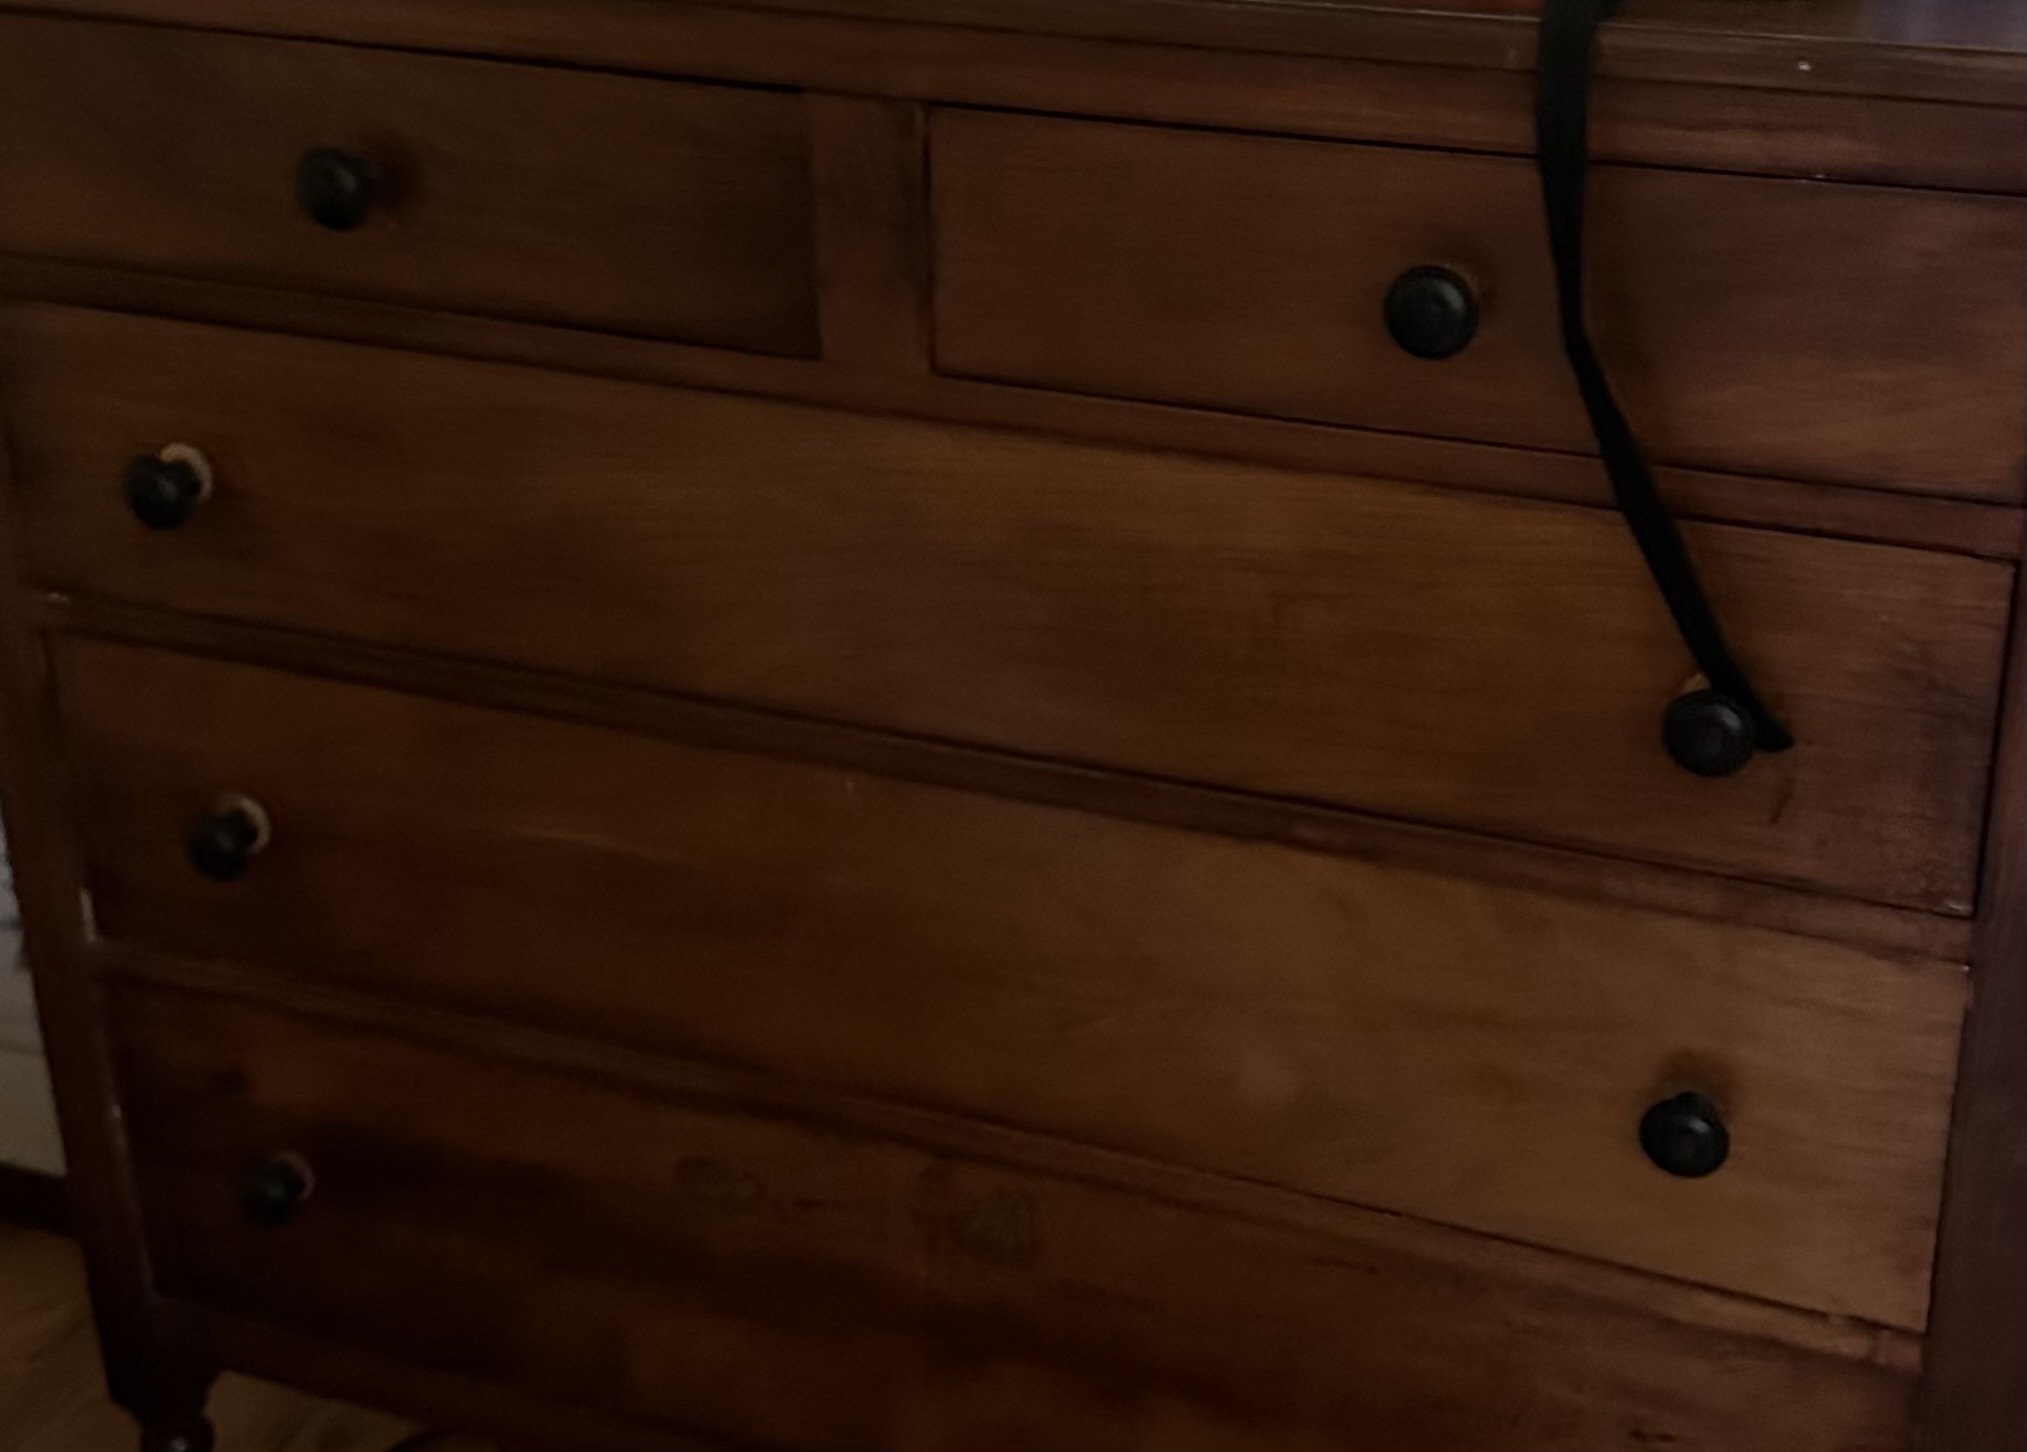
As a Christmas present in 1985, my parents gave me an antique chest of drawers that has needed a facelift for at least two decades now. The date on the back is stamped 1926, and it is made of a dark hardwood. Some of the original knobs fell off, and one drawer needs to be repaired at the bottom. It’s a lovely piece, and the feet resemble the posts on my twin beds that I slept on as a child and that are now pushed together to form a King Size bed. Believe it or not, I still sleep in these beds today with my husband and our three schnoodles.
I couldn’t get rid of the beds. They came out of an old house on Sea Island Georgia, a smaller island off of St. Simons Island, where I lived as a child. The undersides are painted Haint Blue, a common practice on coastal islands in the southeastern United States, rooted in the belief that this color wards off evil spirits and ghosts. Sherwin Williams even has a paint color named Haint Blue. In addition to painting this color under beds, people also paint it onto porch ceilings as well.
Example of a Haint Blue porch ceiling (not mine)
I’ve had paint sample colors, paint stripping paste, and all sorts of brushes and tools ready to give some of our furniture a new life for six months now, and I’m finally getting around to the actual work. That Christmas gift from 1985 was at the top of my list, even though my grandmother’s kitchen table started the big avalanche of projects.
This week, I’ve watched about a half dozen YouTube videos and talked with my furniture flipping daughter on how to use chalk paint and all the variations and ideas for using it. I started simple – – with a can of Greige (a Behr paint color cross between grey and beige) and some new black knobs for the chest of drawers. I learned that a quick sanding is all that is needed, and that chalk paint dries in about 30 minutes, allowing a few coats and a complete project finish in an afternoon except for the wax wait time to cure. I used a small furniture roller and got to work.
Before:
Chest of drawers with trial replacement knobs attached
After:
Finished, waiting for wax to dry and cure (applied in a circular motion, which will show for a week or two) between buffings
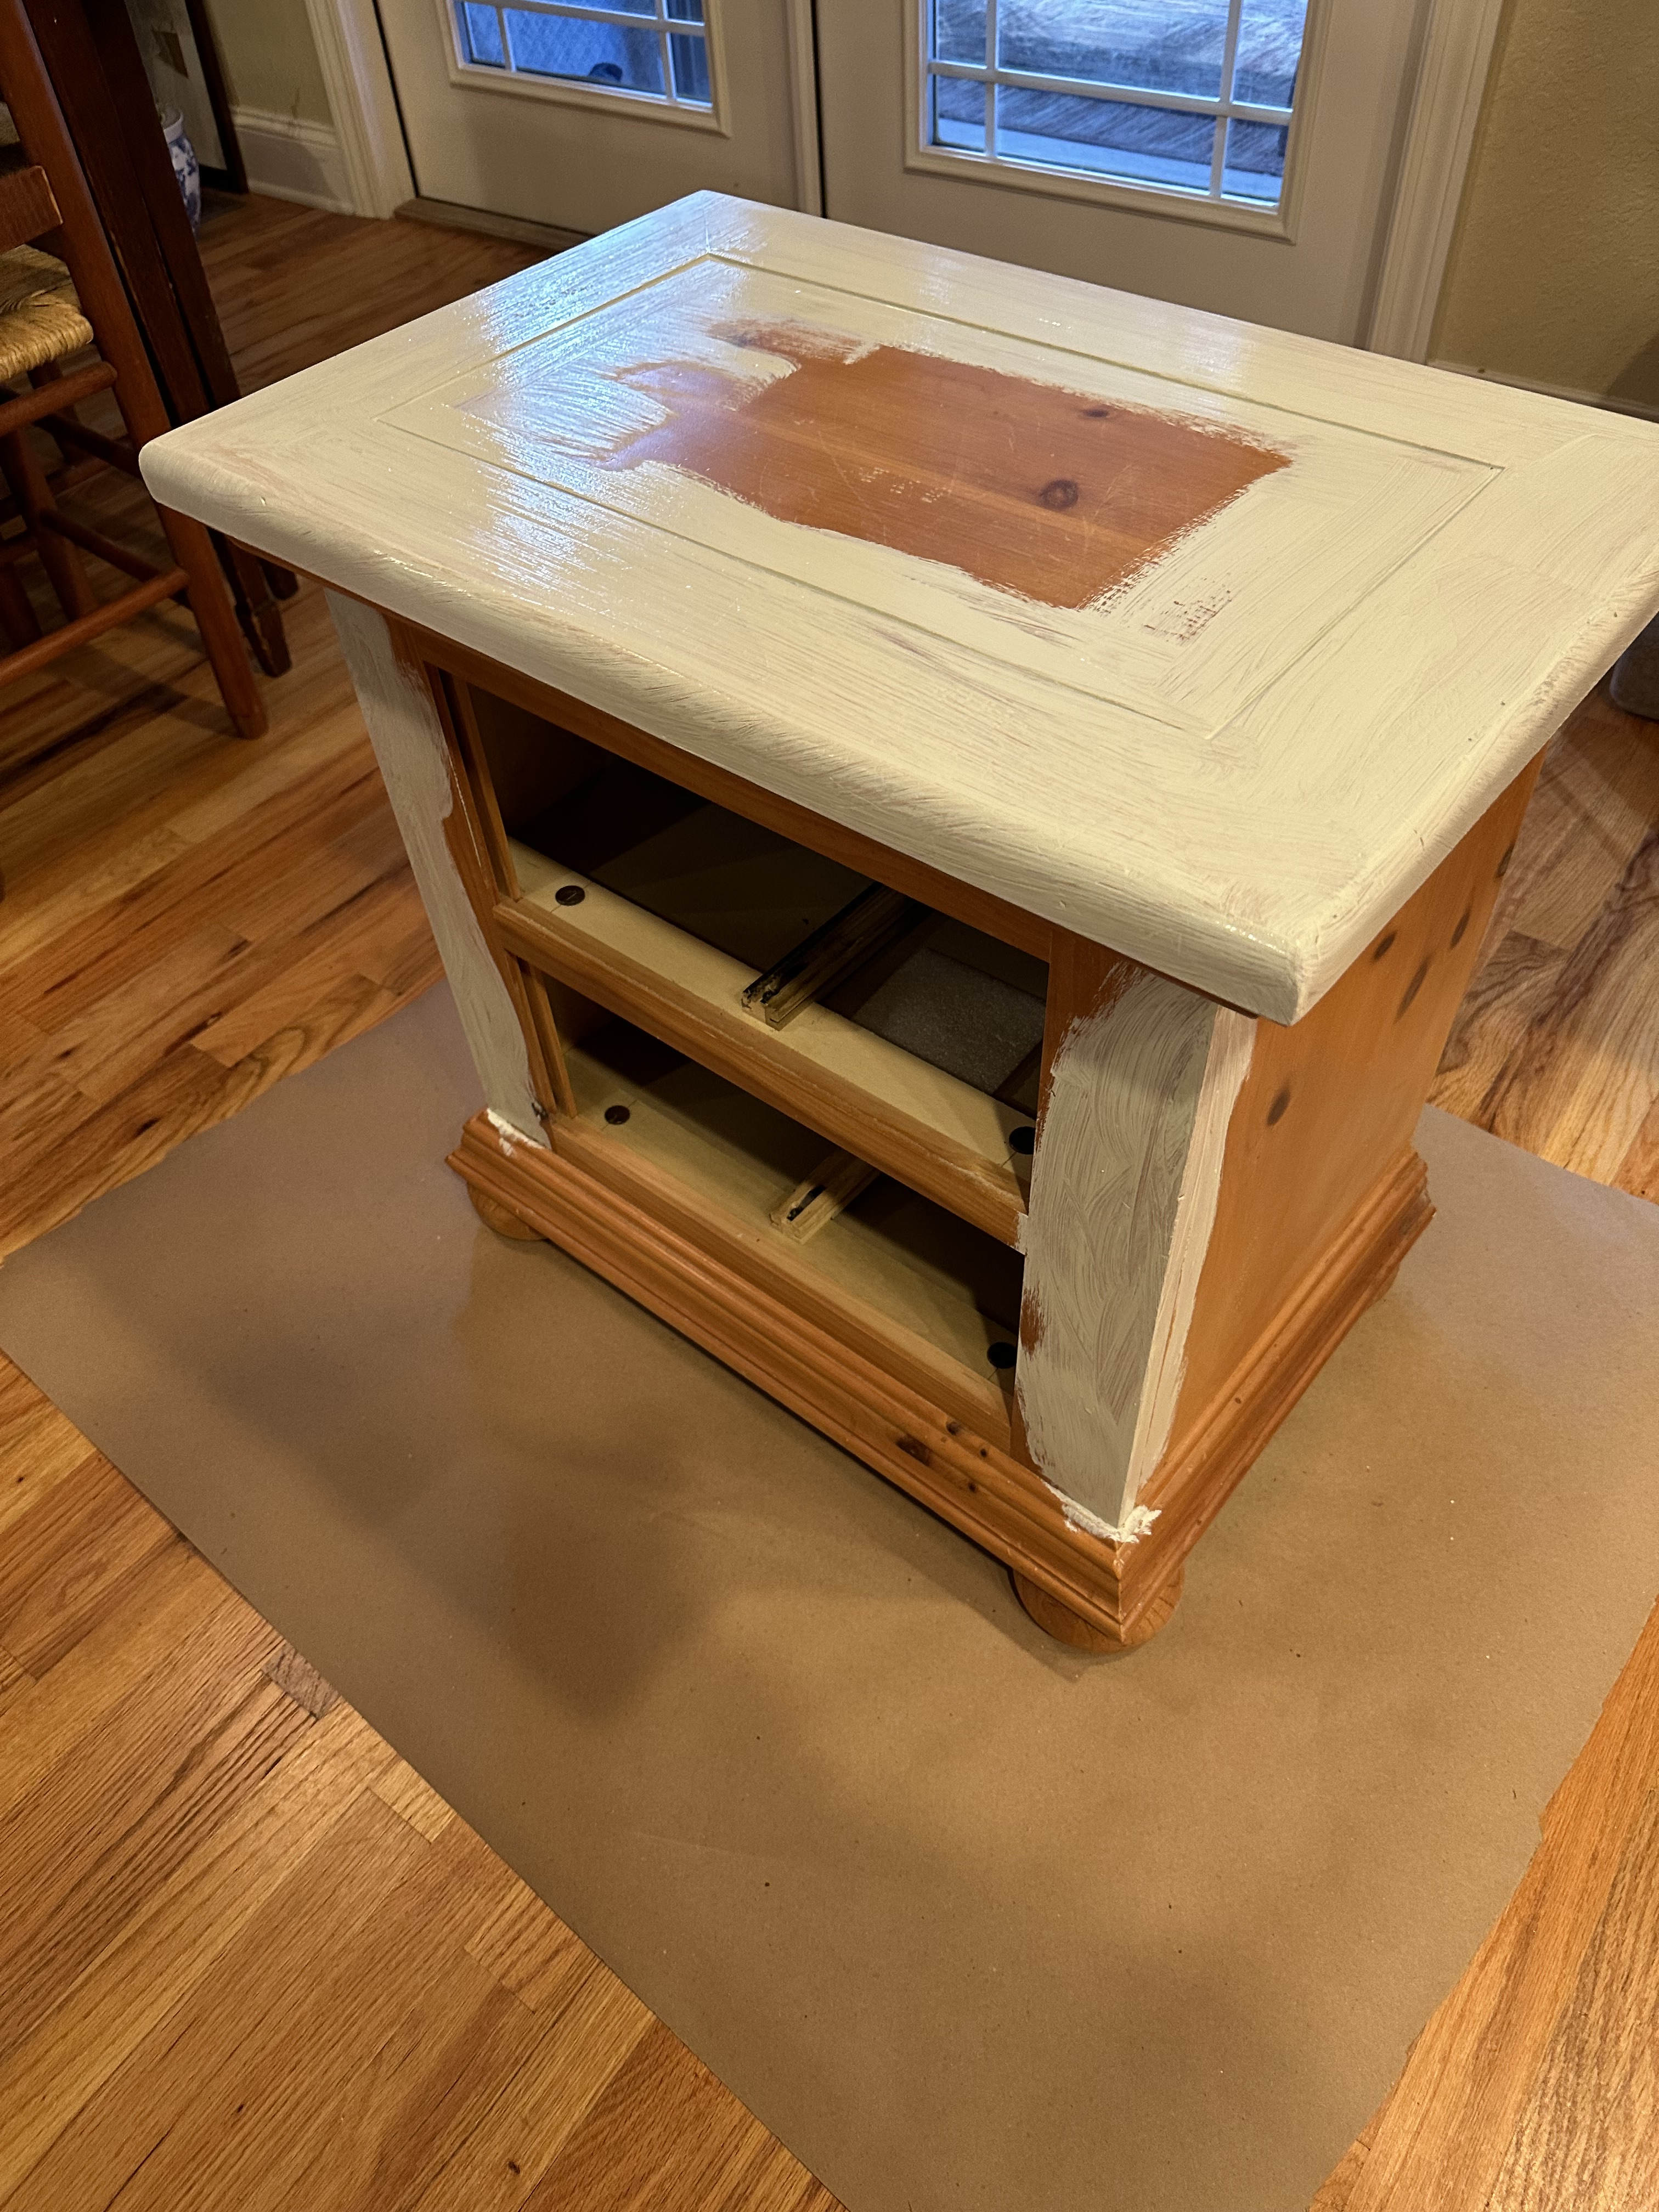
I’m lining the drawers with contact paper to give it a fresher look, and moving on to my next project – – a small end table that I use in my reading room for my coffee by my reading chair.
I’ve chosen Sparkling Sage for the table and will finish the top with a white wash.
One of my daughters flips furniture and has garnered a social media following, sharing what she does in time lapsed videos as she breathes new life into pieces that need a fresh start. I’m always amazed by her before and after photos of the projects she envisions and creates. So when I finally worked up the courage to flip my grandmother’s kitchen table that I’ve had for many years but was scared to refinish for fear I’d mess it all up, I picked up the phone.
My grandmother’s table (leaves in) with paint samples spread across the top, before refinishing
“What do I do?” I asked her. My (almost) sister-in-law had suggested chalk paint, and I loved the idea of a modern farmhouse look.
Ansley told me, and I set out to get the things I’d need: an orbital sander with 80 and 220 grit sanding pads, a 180 grit sanding sponge or paper, a can of Behr chalk paint in Farmhouse White, a good name brand chalk paint brush and wax brush, a tub of chalk paint wax and a lint-free rag, a quality 2-inch stain brush that wouldn’t shed bristles, a drop cloth or other floor covering, and a can of stain mixed with polyurethane in a satin finish. I chose a warm pecan color.
I wore a mask and sanded the dark finish off the top with the 80 grit paper outdoors, then wiped it all down and lightly sanded the bottom with a 180 sanding sponge. Back indoors, I lined the floor with paper in case of spills (I’m so glad I did) and painted the bottom part of the table with 3 coats of chalk paint and the top with 3 coats of the pecan stain/poly mix, sanding with the 220 grit in between coats. Although I paid the price of bending down all weekend with a Monday morning backache, I completed the project in two days and now have a whole different kitchen table.
My grandmother’s table refinished with my daughter’s vision in my kitchen (leaves are out for drying)
We normally don’t have the table situated with the leaves out, but in the picture above, they’re open for drying and the table is pulled apart into its different sections. I’m letting the table dry for a couple of extra days since the leaves will fold in half and rest with tops touching once I roll them back inside the table and lock it shut.
I can hear my grandmother, Georgia Lee Haynes, cheering her granddaughter Ansley’s skills and choices from Heaven as I stand here in my rural Georgia kitchen between the two of them, one in Heaven and one in Kentucky. I’m the one holding a dripping paintbrush with a splotch of white paint in my hair, standing next to the table that will bridge generations from long ago to many years in the future.
Pull up a chair and let’s have a cup of tea and play a game of dominoes – – and feel free to grab a paintbrush and stay awhile…..the chairs are next.
I was scrolling through Pinterest and Facebook for table refinishing ideas in December when I came across these Christmas cookies. The color scheme was perfect! We’ve been doing some upgrades to paint and furniture here and there recently, and I knew when I saw the cookies that I’d found the basic colors and inspiration colors that I’d been seeking.
Imagine that! Finding a color scheme in cookies.
The past couple of Colors of the Year include Evergreen Fog and Blank Canvas – both of which are variations in this collective scheme. We’d used a green and white in our master bedroom, and the nightstands needed a makeover from the 1980s whitewashed pine look. Everything has been everywhere as we have been cleaning up, cleaning out, and recovering pieces, but here is the before picture of one of our two matching nightstands, below.
A quick few coats of chalk paint in Swiss Coffee (Behr) for the base and Evergreen Fog (Sherwin Williams) for the knobs and feet turned out just like I’d envisioned these pieces for a room-brightening change.
I’ve applied the sealing wax, which won’t be completely cured for 2 weeks but enough for initial use after 24 hours. We can’t wait to have a place for our bedside lamps once again!
Next on the list is a chest of drawers in our guest bedroom, where the color scheme includes gray and black. That will be for another day – – meanwhile, I’ll be looking for some new paint colors on the cookie pages.